
If you ask me, pour over coffee is one of those experiences that totally changes how you look at your daily cup of coffee. This brewing method brings precision, flavour control, and a hands-on approach that’s honestly a pretty relaxing part of my morning. If you’re curious about why pour over has a big following or want a clear roadmap to get started, this guide is your definitive resource for pour over coffee for beginners, covering everything from gear basics to technique tips and common questions.
Why Pour Over Coffee Has Coffee Lovers Hooked
Pour over coffee is having quite a moment, but this style actually has deep roots in coffee history. It’s super popular because it really puts you in charge of your brew; each variable, from water temperature to pouring speed, can totally switch up the flavour. This method gets praised for producing bright, clean-tasting cups with more complex notes than automatic coffee makers or even French press coffee can bring out.
The specialty coffee scene has really helped pour over coffee take off in cafes and home kitchens around the world. So if you want a cup where you can taste all those subtle fruity, floral, or chocolatey flavours in your beans, pour over is a smart pick. I love how it invites you to slow down and really savor your coffee, rather than just rushing through another caffeine fix.
If you’re curious about how single origin beans taste with pour over, dig into this detailed guide: Ethiopia Single Origin Coffee.
Pour Over Coffee Gear: What You Actually Need
Getting started isn’t as complicated as it might seem. You just need a few pieces of gear to make your first delicious cup. Here’s what I’d recommend if you want things simple but still high quality: As The Coffee Twins, we suggest beginners prioritize the grinder and fresh beans first.
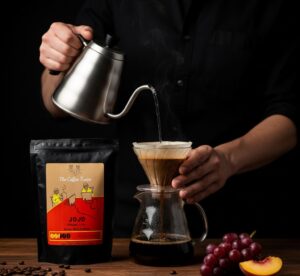
- Coffee Dripper: This is where your coffee magic happens. I use both ceramic and stainless steel drippers; each one gives a slightly different result. Popular models include the Hario V60 and Chemex, but there are plenty of options at different price points.
- Paper or Metal Filters: These catch the grounds and help create that signature clean cup. Paper filters cut down oils for a lighter body, while metal ones let more through for a richer mouthfeel.
- Gooseneck Kettle: The thin spout gives you full control over pouring speed and direction. This is important for even extraction and bringing out flavours.
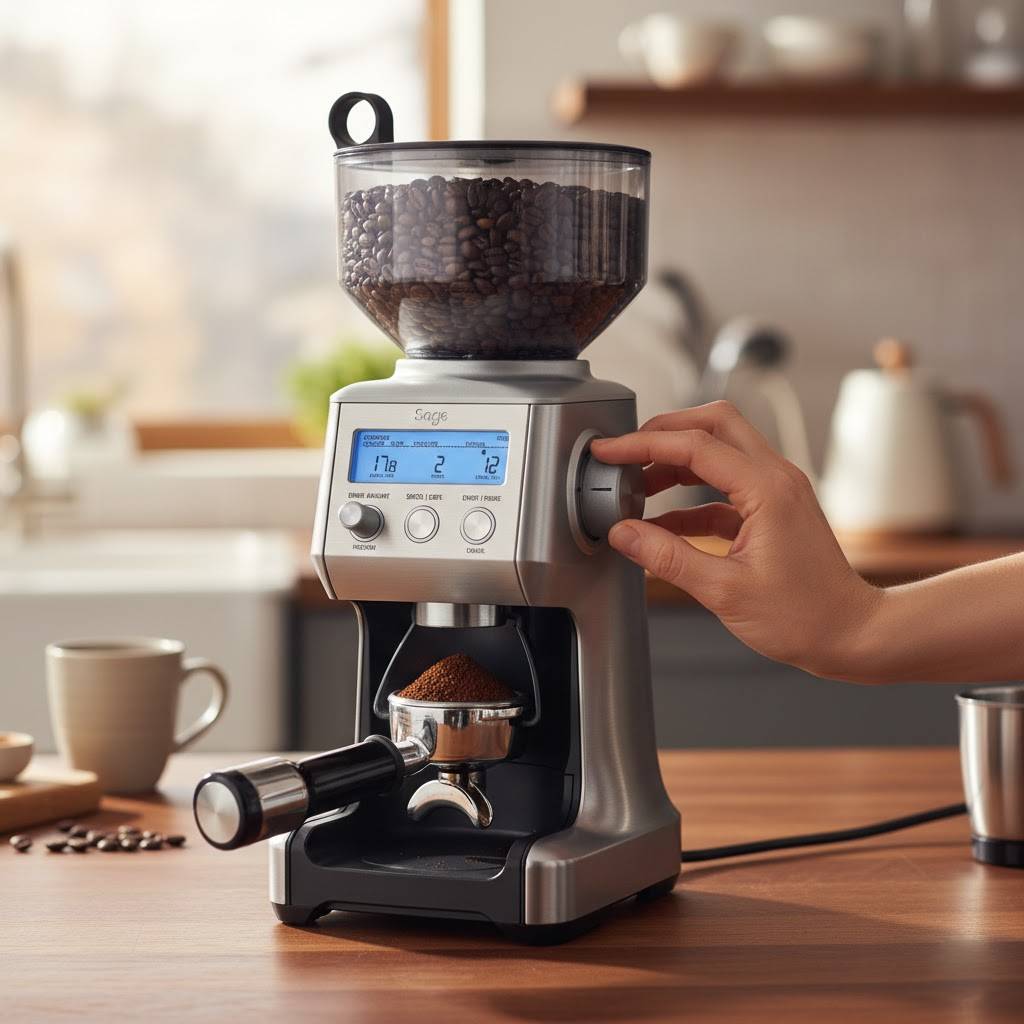
- Quality Grinder: Freshly grinding beans right before you brew is a game changer. Burr grinders are best for a consistent, medium grind that makes pour over shine.
- Scale: A digital scale helps make every cup repeatable. Coffee fans swear by weighing beans and water for the best results, and honestly, it removes lots of guesswork.
- Fresh Coffee Beans: Freshness is huge. For something special, I like to use single origin beans. My favourite options lately are the Jojo Blend and Parrot Blend; both really suit pour over brewing because of their unique flavours.
If you want to keep it even simpler, you can try portable pour over packs that have the dripper and filter combined. While not as customizable, they’re handy for camping or travel so you never have to settle for bad hotel coffee again.
How to Brew Pour Over Coffee: Beginner Steps
The process might look a bit complicated at first, but after a few tries it feels natural. Here’s the basic step-by-step approach I use every morning:
- Heat your water: I go for 90-96°C (195–205°F) (just off the boil). Too hot or too cold can mess with your extraction.
- Set up your dripper: Place a filter in your dripper. If you’re using a paper filter, rinse it with hot water to get rid of any papery taste.
- Weigh and grind your beans: I recommend 18–20g of coffee to 300g of water for a solid 10-oz cup. Grind your beans to a texture like sea salt; it should be medium and even.
- Add grounds and bloom: Pour the grounds in, make a little well in the center, then gently pour just enough hot water to wet all the grounds (about twice the coffee weight in water). Let the coffee “bloom” for 30–45 seconds. This helps release trapped gas and preps for better extraction.
- Pour slowly and evenly: Pour remaining water in circles over the grounds. Take your time, and aim to evenly cover the surface. The total brew time should be about 2.5 to 3.5 minutes. If it’s running super fast or slow, adjust your grind next time.
- Let it drain and enjoy: Once the water drains through, pull out the dripper. Give your brewed coffee a little swirl and you’re set for a fantastic cup.
Practice makes perfect. Don’t get discouraged if your first cups aren’t completely mind-blowing. Even “bad” pour over coffee still tends to beat whatever comes from a drip machine or drive-thru window.
Choosing the Right Beans For Pour Over
The beans you pick have a huge impact on your final cup. I’m a big fan of trying out single origin options with pour over, since you can really pick up all the flavour notes that might get muddled in a dark roast blend. But it’s your call!
- Light Roasts: They tend to show off more fruit and floral notes. If you want something lively, this is a good place to start.
- Medium Roasts: A comfortable balance with caramellike sweetness. Good for people who want complexity but not too much acidity.
- Dark Roasts: Pour over will make these taste clean and bold, but you’ll lose some of the subtle flavours that lighter roasts show off.
Try out the Jojo Blend for a sweet, versatile profile, or go for the Parrot Blend if you want a little more brightness and complexity. Swapping your beans every so often keeps things interesting; you might stumble upon a new favourite when you least expect it. You can even try experimenting with blends compared to single origin to see which gives you more of the flavour notes that you like most.
If you’re looking to boost your tasting experience, track down beans with a roast date within the past two weeks. When you use beans at their freshest, you’ll really spot the delicate aromas and taste more sweetness in your cup. Specialty roasters often put a roast date right on the bag, making it easy for you to get the freshest possible beans.
Common Pour Over Coffee Mistakes (And Easy Fixes)
Even the most coffee obsessed people trip up sometimes. I’ve botched my fair share of cups before dialing in my routine. These are the issues I see most often:
- Grind Size is Off: Too fine and your coffee will taste harsh or bitter; too coarse and it’s weak and flat. If your brew is taking longer than four minutes to drip through, go coarser. If it finishes in under two minutes, try finer.
- Water Temperature is Wrong: Boiling water can “burn” the coffee, while lukewarm water makes it underwhelming. Stick as close to 200°F as you can for consistent results.
- Poor Pouring Technique: Splashy, uneven pouring leads to inconsistent extraction. Keep your wrist relaxed and aim for steady, slow circles. Some people like to use a spiral motion or a center-focused pour, so try both and see what works for you.
- Not Rinsing Paper Filters: This tiny extra step can really make a difference. A quick rinse washes away lingering paper flavours and preheats your dripper at the same time.
- Wrong Coffee To Water Ratio: “Eyeballing it” often leads to inconsistent cups. If you want reliable results every time, a scale is really helpful.
It’s honestly normal to run into a few rough batches while finding your groove. The important part is to keep experimenting and noticing the big impact these small adjustments have on flavour.
Pour Over Coffee: Advanced Tips For a Next-Level Cup
Once you’re comfortable with the basics, there are a few extra tweaks you can try for even better results:
Play With Your Pour: Switch up your pouring technique to see how it affects taste. Try pulsing the pour (stopping and starting), changing your pouring speed, or focusing water more in the center or towards the sides to tweak extraction.
Freshness is Everything: Coffee beans start to lose flavour fast after being ground or roasted. Small batch, freshly roasted beans give better results every single time. Try storing beans in airtight containers away from sunlight to keep them in top shape.
Adjust Your Recipe: If the cup is too strong or too weak, tinker with your coffee-to-water ratio 1-2 grams at a time. Little changes really make a big difference. This is the fun part of perfecting your own “house recipe.”
Use Filtered Water: Tap water can introduce odd flavours. Filtered or spring water usually gives you a cleaner, sweeter cup by removing any unwanted minerals and tastes from your final brew.
Experiment With Different Brewing Times: If you prefer a lighter, brighter cup, shoot for a quicker brew time by pouring a bit faster or using a more coarse grind. For a bolder cup, try a slower pour or slightly finer grind to bring out more notes. Test out what works best for your beans and your taste buds.
Trying out different recipes, beans, and techniques is all part of the fun. Your preferences might change as you explore, so don’t be afraid to change things up with new methods, ratios, and tools. How you make your cup is totally up to you, and the process can get as nerdy as you want it to be!
Pour Over Coffee FAQ
I get a lot of questions from friends and readers who are new to pour over. Here are a few that come up a lot, along with my take on each one.
Question: Do I really need a gooseneck kettle?
Answer: You can start out with any kettle, but a gooseneck makes it way easier to pour slowly and evenly. I think it’s worth it, especially once you get a feel for brewing by hand and want to fine tune your results.
Question: Can I use pre-ground coffee?
Answer: Pre-ground is fine in a pinch, but whole beans ground right before brewing make a world of difference in terms of flavour and aroma. A basic burr grinder is a good coffee investment if you plan to stick with pour over.
Question: Why does my pour over coffee taste sour or bitter?
Answer: Sour means under extracted (try finer grind or longer brew time). Bitter means over extracted (try coarser grind or reduce brew time). Change just one thing at a time to see what fixes the taste. Patience and a little note keeping help here.
Question: What water is best for pour over?
Answer: I recommend filtered water or spring water. Hard water or water with too much chlorine can cover up the delicate coffee flavours and leave your cup tasting flat or chemical-like.
Wrapping Up: Why Pour Over Coffee Is Worth Learning
I think pour over coffee has a real charm. It’s approachable, hands-on, and gives you cafe level results at home with just a little practice. You don’t have to be a coffee scientist to get good results, either. Just a bit of patience and curiosity goes a long way. If you’re looking for the simplest approach to get started, this pour over coffee for beginners guide has everything you need.
If you want to make the most out of your beans and enjoy the process, pour over is worth trying. Check out the Jojo Blend and Parrot Blend if you’re looking for new beans to experiment with, and feel free to explore even more brewing guides at The Coffee Twins blog.
It’s a really satisfying way to start your day, connect with your senses, and just appreciate a good cup of coffee. Happy brewing!


0 Comments